From Dessert to Breakfast Bliss: Lemon Cake French Toast Delight

Easy Steps to Turn Leftover Cake into Breakfast Bliss

Have you ever bought or made a cake for an event or even just because you could, expecting it to disappear... then realized later that basically all of the cake was still there? Maybe you didn't have the turnout you expected. Maybe your family just wasn't terribly interested in the cake. It doesn't much matter why, but somehow you have a whole cake sitting there that you aren't about to scarf on your own.


That's us this week. We got a lemon cake from the grocery store, cut it up, and that was about as far as it got. So now we have 97% of a lemon cake and we...  Well, we don't like lemon cake enough for that silliness. 


Time to get inventive! Thus, lemon cake French toast with blueberries.


Full disclosure: we used a two-day-old cake for this, not a fresh one, and it is assuredly store-bought. It's significantly sweeter and softer than the average homemade cake. It did not do the drying around the edges thing that a homemade loaf or bundt does when cut. If you work with homemade, the best way to get the same texture we did is to work with it fresh and not let it soak up too much of the custard.


Ingredients:

3 eggs

1/4 cup milk

Pinch salt

Salted butter

Lemon cake


2 cups frozen blueberries 

1/4 cup water 

1 tablespoon lemon juice

1 teaspoon vanilla extract


Tools:

Mixing bowl

Spatula

Spoon, knife, fork

Measuring cups and spoons

Heavy bottomed skillet 

Saucepan with lid 


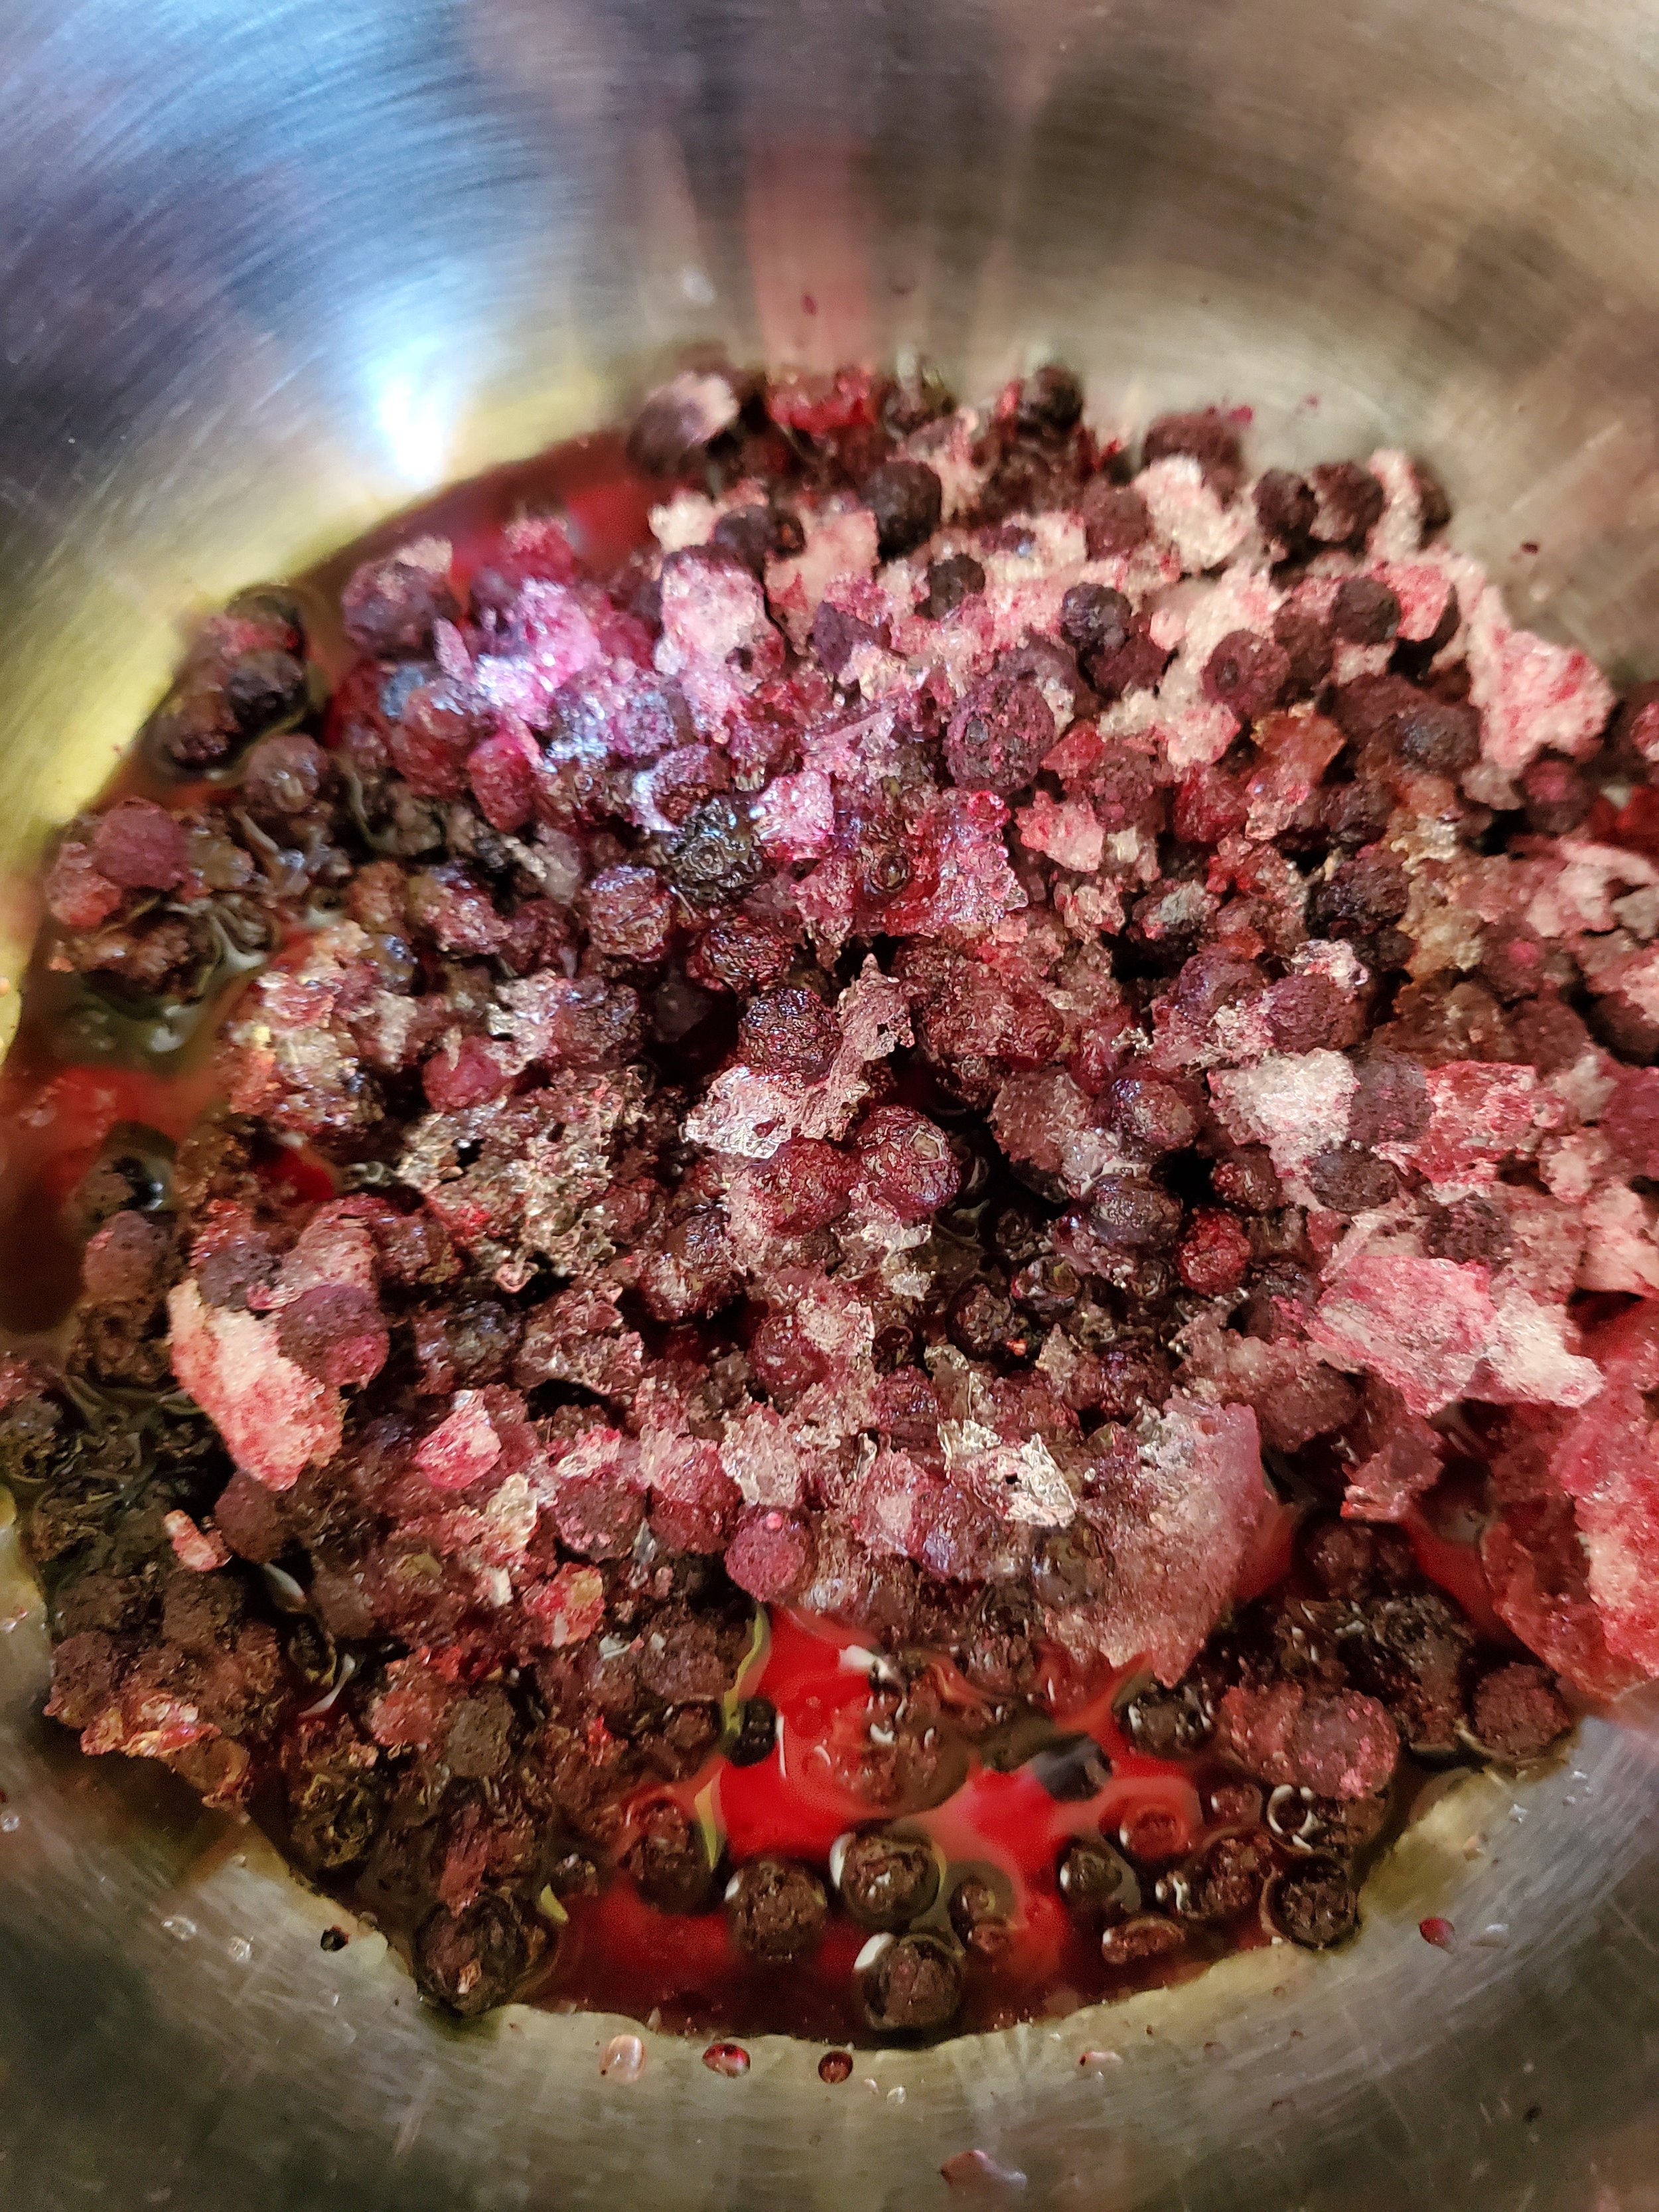
Because the blueberries take longer, we strongly recommend starting with them. Measure your blueberries into a saucepan, then add the tablespoon of lemon juice, teaspoon of vanilla extract and the water.


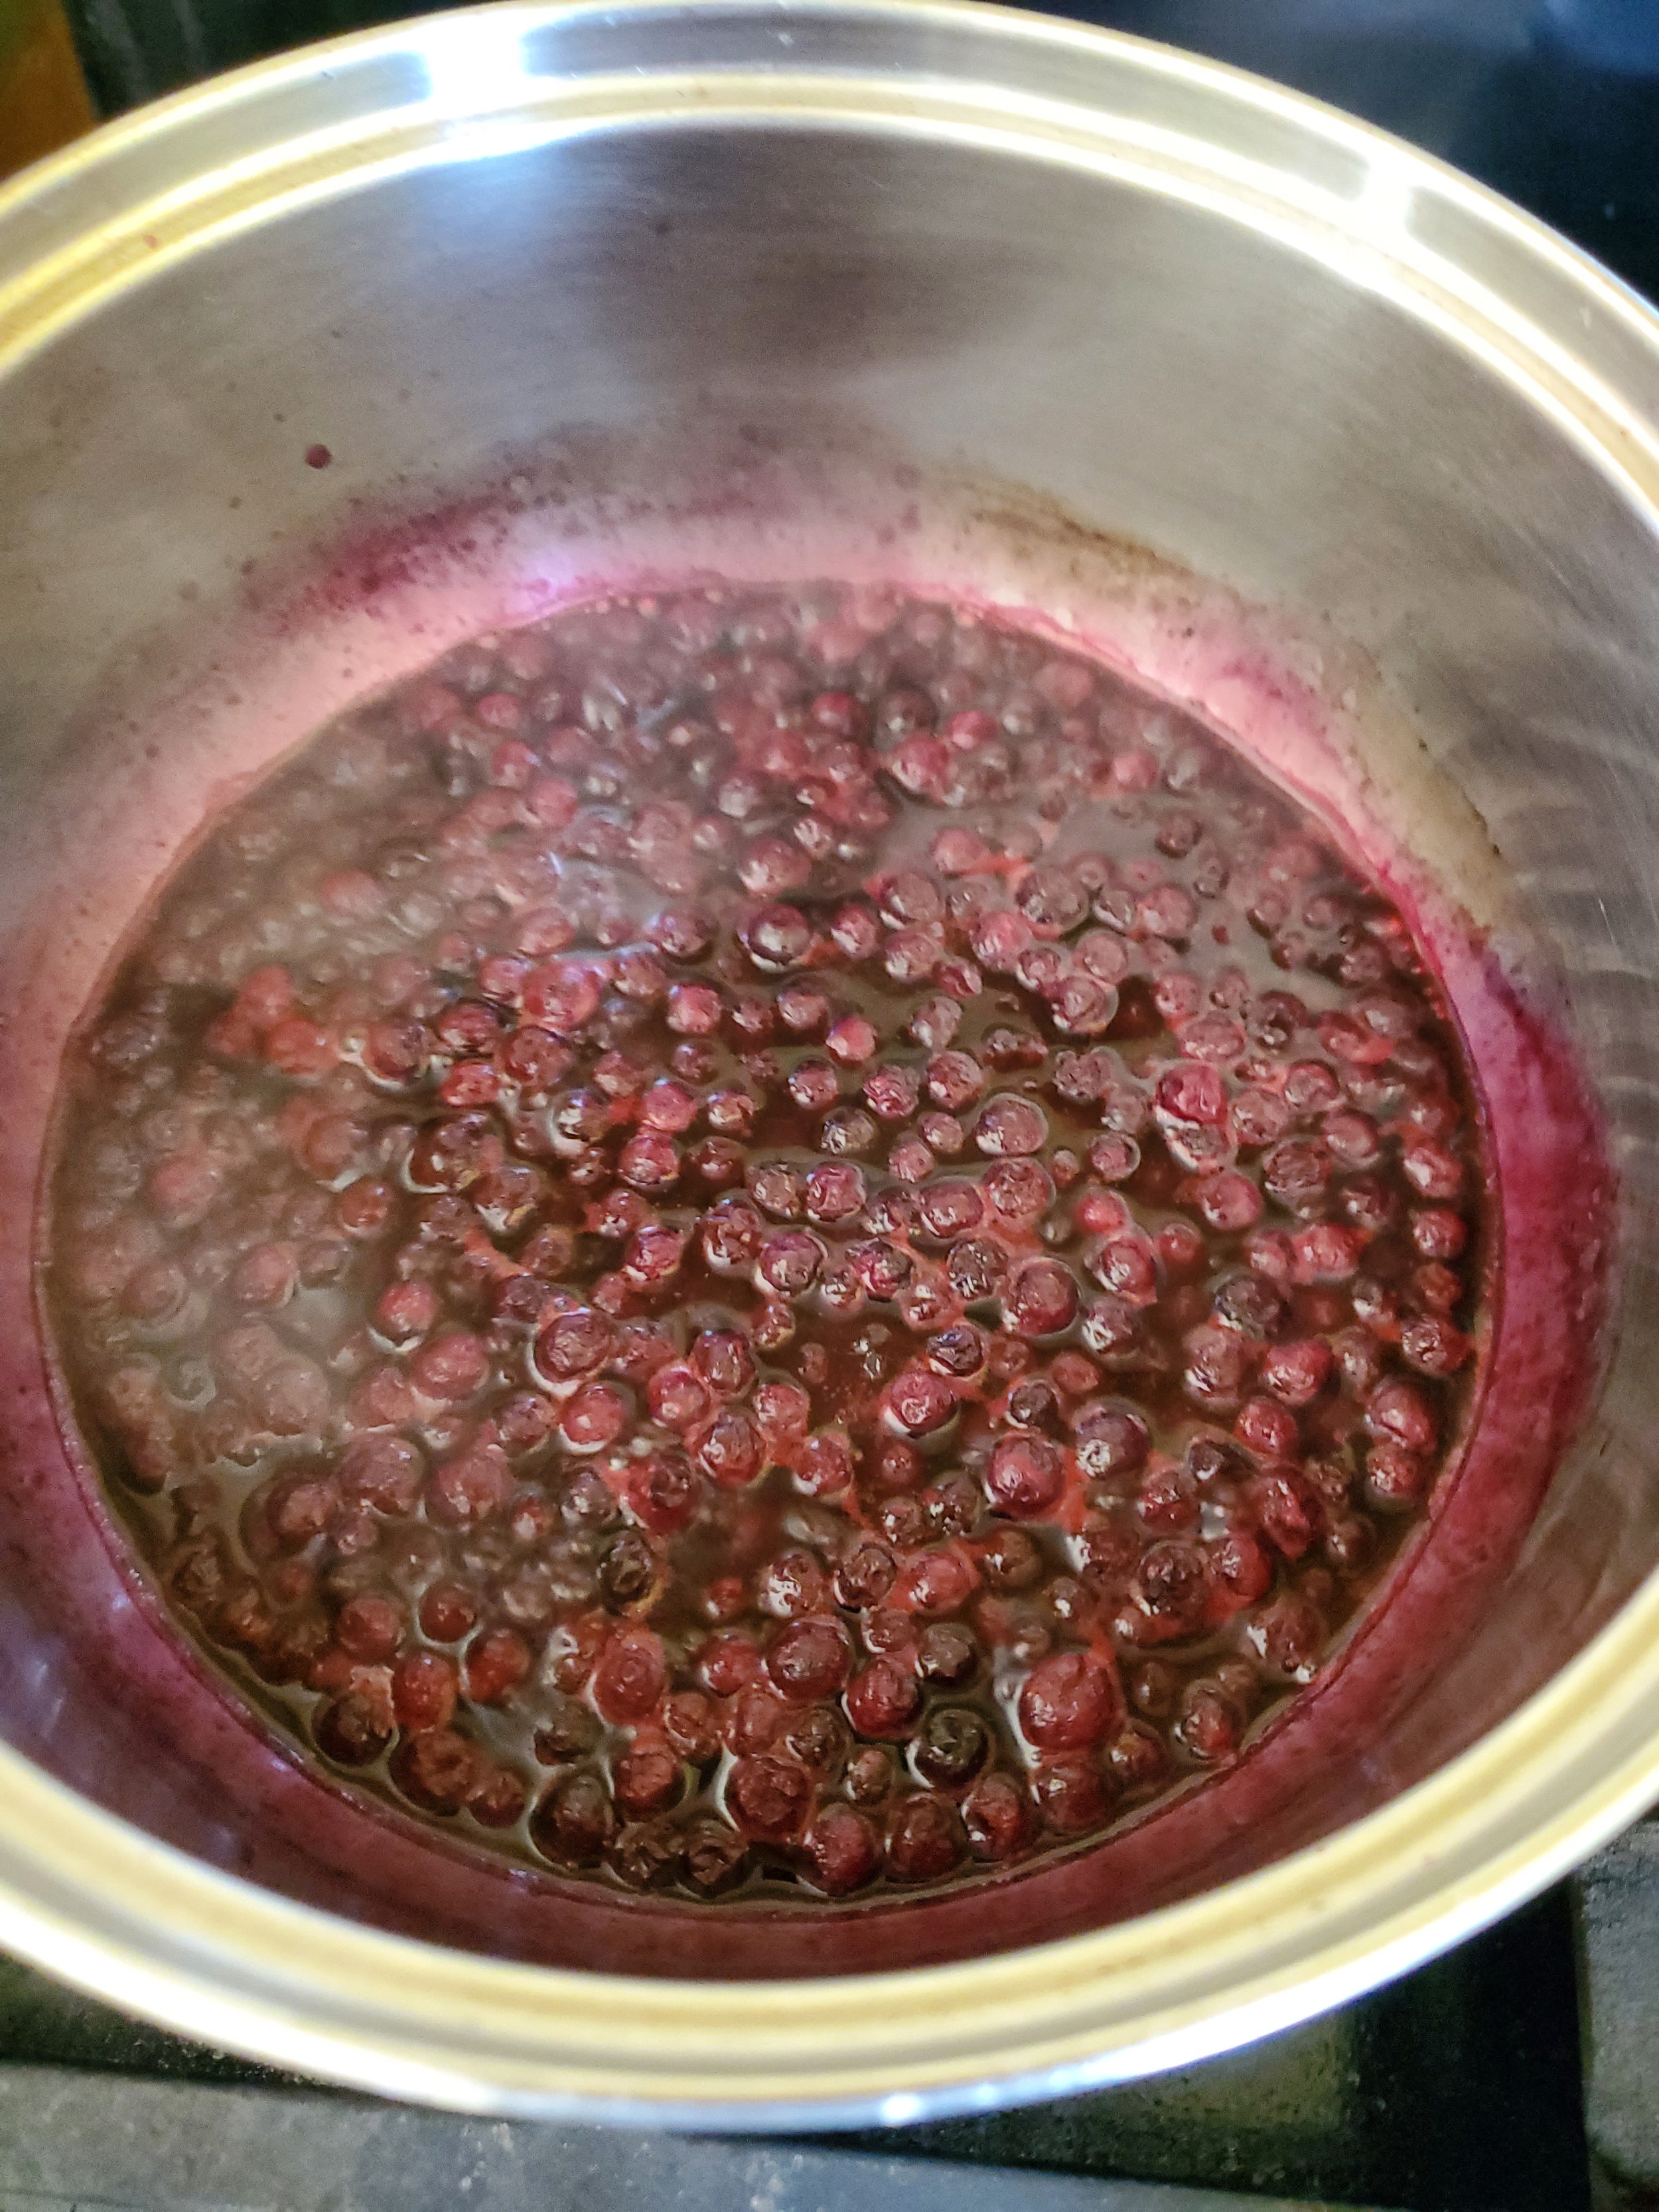
If you find blueberries to be a bit sour, you can add a little sugar, but we like them just as they are and omit the extra sweetener. Set the heat to medium-low, cover the pan, set a timer for 15 minutes and basically forget about it for a bit.


In a shallow mixing bowl, whisk together your eggs and milk and add a tiny little pinch of salt. You can add a little more milk or use a little less, depending on your preferences - everyone does French toast a little differently in our experience. We don't recommend sugar, cinnamon or vanilla be added here as is common in most French toast recipes. The cake is already super, super sweet.


Melt some salted butter in a skillet over low heat - definitely do not sub unsalted butter, as the result will be all sweet with very little to balance it.


Dredge, flip, and dredge again the slices of cake through the custard, then add to the hot butter. Avoid allowing cake slices to sit in the custard, as they'll get soggy and fall apart.


Also try not to overcrowd the pan, as the slices will take longer to cook and be harder to flip. We fit five small slices into our skillet with enough room for flipping, but obviously your mileage may vary here. Maybe you have a giant cast iron skillet and can fit a whole cake in there. If you do, great - and also, where did you get it? We would like to have one too.


Cover the pan and let the cake cook for two to three minutes, then uncover, flip with a spatula (you may also need an assist from some tongs, depending on how soft your cake slices are), cover and repeat the "cook for two to three minutes" part. We like our French toast nice and toasty but not quite all the way to "scorched." Please adjust your cook time accordingly if you disagree.


Remove the finished slices from the pan and set them aside on a plate covered with another plate to keep some of the heat. If you have a crowd waiting, and said crowd is less interested in the blueberries that aren't done yet, you can just hand them off to hungry kiddos holding out plates as they leave the pan. Somehow, every variation of French toast seems to draw this crowd, so chances are pretty high you do have someone peeking around you trying to get the first piece.


Once the second wave of slices is in the skillet, grab a clean spoon so you can stir your blueberries. After giving them a quick stir, leave them uncovered for their remaining cook time. The goal is to have the liquid reduce some.


For the second wave of lemon cake French toast, we sprinkled some poppy seeds onto the slices as the first side cooked, then flipped and allowed the heat to sear them into place. This is totally optional, but hey, if you like lemon poppy seed muffins, why not give it a shot?


Once the blueberries are done, assuming there are still any slices of French toast left for the cook, make yourself a plate with a couple pieces and drown them in blueberry sauce.


Add some syrup if you're so inclined, but we'd definitely avoid any powdered sugar. Kids are thrilled; moms see the sugar content of this recipe and weep. Cake as a meal is kind of a rarity for a reason.


As you savor each sweet bite of this lemon cake French toast, you'll marvel at how a simple leftover can be transformed into a breakfast masterpiece. Whether you're enjoying it with family on a lazy Sunday morning or impressing guests at a brunch gathering, this recipe is sure to be a hit. So next time you find yourself with leftover cake, don't throw your hands up—embrace the opportunity to create something special. With a dash of creativity and a sprinkle of culinary magic, you can turn any ordinary day into a delicious adventure. 


If you’re struggling with any of your kitchen appliances while making this sweet treat, don’t wait on calling Appliance Rescue Service. We’ll work with you to get your home running smoothly again. 


Website

Call: (214) 599-0055


Beat the Heat: Preparing Your Texas Home for Summer

Essential Tasks to Keep Your Home Running Smoothly When the Heat Hits

Can you feel the warmth in the air? It's a sign that summer is already on its way! But before you start planning your vacation trip and weekend barbecues, your home needs to be prepared for the season too. There are plenty of tasks that you can do around the house to keep it cool and running smoothly during the hot months. Don't worry, though, we've got you covered. We'll guide you through each step so you can sit back, relax, and enjoy the summer season without any worries.


We've sorted the tasks by inside the home and outside the home; so that you can do each task as the weather allows.

Inside the House

Ceiling Fan Rotation

Make sure to change your ceiling fan rotation Courtesy of eak_kkk

This one is relatively simple. As the year changes, you can benefit from changing the rotational direction of your fan. During the summer, it's best to have your fan turning counterclockwise. This pushes the cool air down towards the floor and helps you stay cool.


Plumbing Checks 

Check Valves And Hoses

The valves and hoses for your washing machine, and your interior and exterior faucets all have connection points that can become loose and even break. As we are heading into summer and you're doing more you want to go ahead and check on these this way you catch any trouble before it starts. You will almost certainly need a professional to make any major changes, but just checking and finding trouble spots is something you can absolutely do on your own.


Inspect Your Pipes

As we all know, summer in Texas is ridiculously hot and dry. Unfortunately, that heat and lack of moisture can cause your pipes to deteriorate and crack. That can then cause the pipes to leak or, in a worst-case scenario, burst. So before you start forcing hundreds of gallons of water through your pipes, it's better to check on any and all of them that you can get to and catch any problems beforehand.


Insulate Your Home 

The amount of work insulation usually requires Courtesy of justynkalp

Your home's insulation is essential for keeping you comfortable in both hot and cold weather. However, if you are unsure about the quality of insulation in your home or wish to enhance the existing insulation, several options are available. Checking the insulation in your attic and walls is crucial for ensuring your home is properly insulated. However, most of us hesitate to pull down sheetrock to check the insulation. Fortunately, there are alternative options available. One of the best options is an additive that can be mixed with paint and applied to roofs, interior, and exterior walls. Although it does not replace the need for proper insulation, it has proven to make a significant difference in energy efficiency, according to testing.


Swap Out Shades For Curtains 

If you haven't already done it, we highly advise swapping out your winter shades for lighter summer curtains. Whether this means lighter in just color, or lighter in color and material is up to you. Being able to open your windows and let the breeze pour in is helpful for lowering your electric bill.


Fridge

The seasons are turning, which means it is the next time you need to clean out behind your fridge. It might not be the most glamorous task, but your fridge will most certainly appreciate being able to breathe properly. As always, make sure that you tend to the coils and any built-up dust or debris, and move your fridge back into proper alignment so that airflow can circulate around it. 


Make sure that you're using a vacuum with a soft brush attachment. You don't want to use water back here as that can damage electrical components, and then you will have a very pretty and oversized box rather than a fridge.


Now that you've tended to the outside of your fridge let's check out the inside. You'll want to closely examine the seals on your refrigerator door all the way around, first by eye and then by hand. You want to ensure that there aren't any spots that are damaged and that the seal doesn't need to be replaced. Once you've checked that out, the next step is to grab a washcloth, some warm water, and soap so that you can clean out any stickiness or debris from the seal. Making sure that your doors can close and seal properly ensures that the fridge can maintain its temperature accurately. Taking care of your fridge like this ensures a much longer and happier life on the part of your appliance.

Washer And Dryer 

Your washer and dryer need to have the seals checked, just like we did with your refrigerator. Again, you want to check by eye and then by hand for any signs of debris damage or, in the case of your washer, mold. For your dryer, you want to make sure that there isn't any accumulated lint in and around the seal. 


Since the air is already warm during summer, you will want to address the settings on your dryer for summertime. It is not uncommon for dryers to catch fire from being turned up too high. While you're at it, you should also have the filters checked and cleaned by a professional to get rid of any built-up lint. At the same time, having someone look at your washing machine filters and drains would be a good step to roll into the same call.

Now that we've done the inside of the home, let's head outside and see what we can find.


Outside the House 

Clean Gutters 

It's been a while since we pointed it out, but having your gutters cleaned at least twice a year is extremely important. If your gutters are still jammed full from winter leaves, you can easily have cracks and leaks begin to form under and around them. With time those will begin to damage your home. 


Repair Siding 

If you have wood siding or shingles, now is a great time to check for post-winter rot. You can also check for dirt or mold that might have built up during the spring and winter rains.You can also look for and repair any damaged areas, faded stain, or chipped paint.

Inspect the Roof

A roof that has become damaged over time due to winter rot. Courtesy of congerdesign

Now, we're not suggesting that you do any roof repair yourself. Between the potential for a fall and the heat, we don't think many of us would want to go up. Instead, grab your binoculars and head across the street to take a look around at your roof. You will be looking for any cracked, curling, or missing shingles on your roof. And while you're at it, you want to make sure that there isn't any damaged or missing flashing. Keep a close look on your chimneys, your pipes or any skylights that you have. Just like with the valves and hoses, if you already know where to point a professional, then youve already solved part of the problem. 


Clean The Grill 

When you've got a cooler day, you might as well open up the grill and give it a good cleaning. Most of us love cooking on the grill during the summer, whether it's for family events or just regular weeknight dinners, grills are a uniquely summertime tool. To that end, make sure you go over everything. Not just to clean it, but to make sure that the connections are still in one piece. If there are any wires or pipes, check to see that nothing has been chewed on, or destroyed by the elements. Essentially, you want to go over any piece that could break and make sure it's functioning properly and then go over any piece that can be dirty and clean it before you light your grill for the first time. 


Summer heat and way too hot in Frisco texas by Stux

As summer approaches, it's time to get your home ready for the heat and outdoor fun. From ceiling fan adjustments to grill cleanings, we've got you covered with these essential tips to ensure your home stays cool and comfortable all season long. But if you ever find yourself in need of professional assistance with your appliances, Appliance Rescue Service is just a call away. Whether it's a malfunctioning refrigerator or a faulty dryer, our team is here to help keep your home running smoothly. Don't hesitate to reach out for expert maintenance and repair services. Enjoy your summer worry-free with Appliance Rescue Service by your side.


Call: (214) 599-0055

Website 


Additional Reading
Kitchen Safety 101: Protecting Your Little Ones at Home

Organizing Your Home Before the Holiday Daze

 Halloween Horrors In Your Home?

Energizing Tuna and Turmeric Rice Balls: Perfect for Busy Days

Prepare Ahead, Enjoy Later: A Convenient Meal Option

This recipe is a great option for those who are always on-the-go and looking for a protein-packed lunch to stay energized throughout the day. Although it may require some effort and create a bit of a mess while preparing, the end result is definitely worth it. With its delicious taste and wholesome ingredients, this recipe is perfect for busy spring and summer days when you need a quick and healthy meal that will keep you fueled and satisfied.


Ingredients:

2 cups sticky rice

2 3/4 cups water

1 tablespoon white vinegar

1 teaspoon turmeric

pinch salt and black pepper


2 cans tuna in water, drained

1 tablespoon olive oil

1 teaspoon garlic powder

1 teaspoon paprika

3/4 teaspoon ground thyme

1 tablespoon parmesan cheese


1/2 cup breadcrumbs

spray olive oil


Tools:

Measuring cups and spoons 

Small pan with lid

Fine sieve or colander

Assorted dishes for shaping and dredging 

Plastic wrap

Ice cream scoop

Spoons

Fork

Can opener

Baking sheet

Aluminum foil


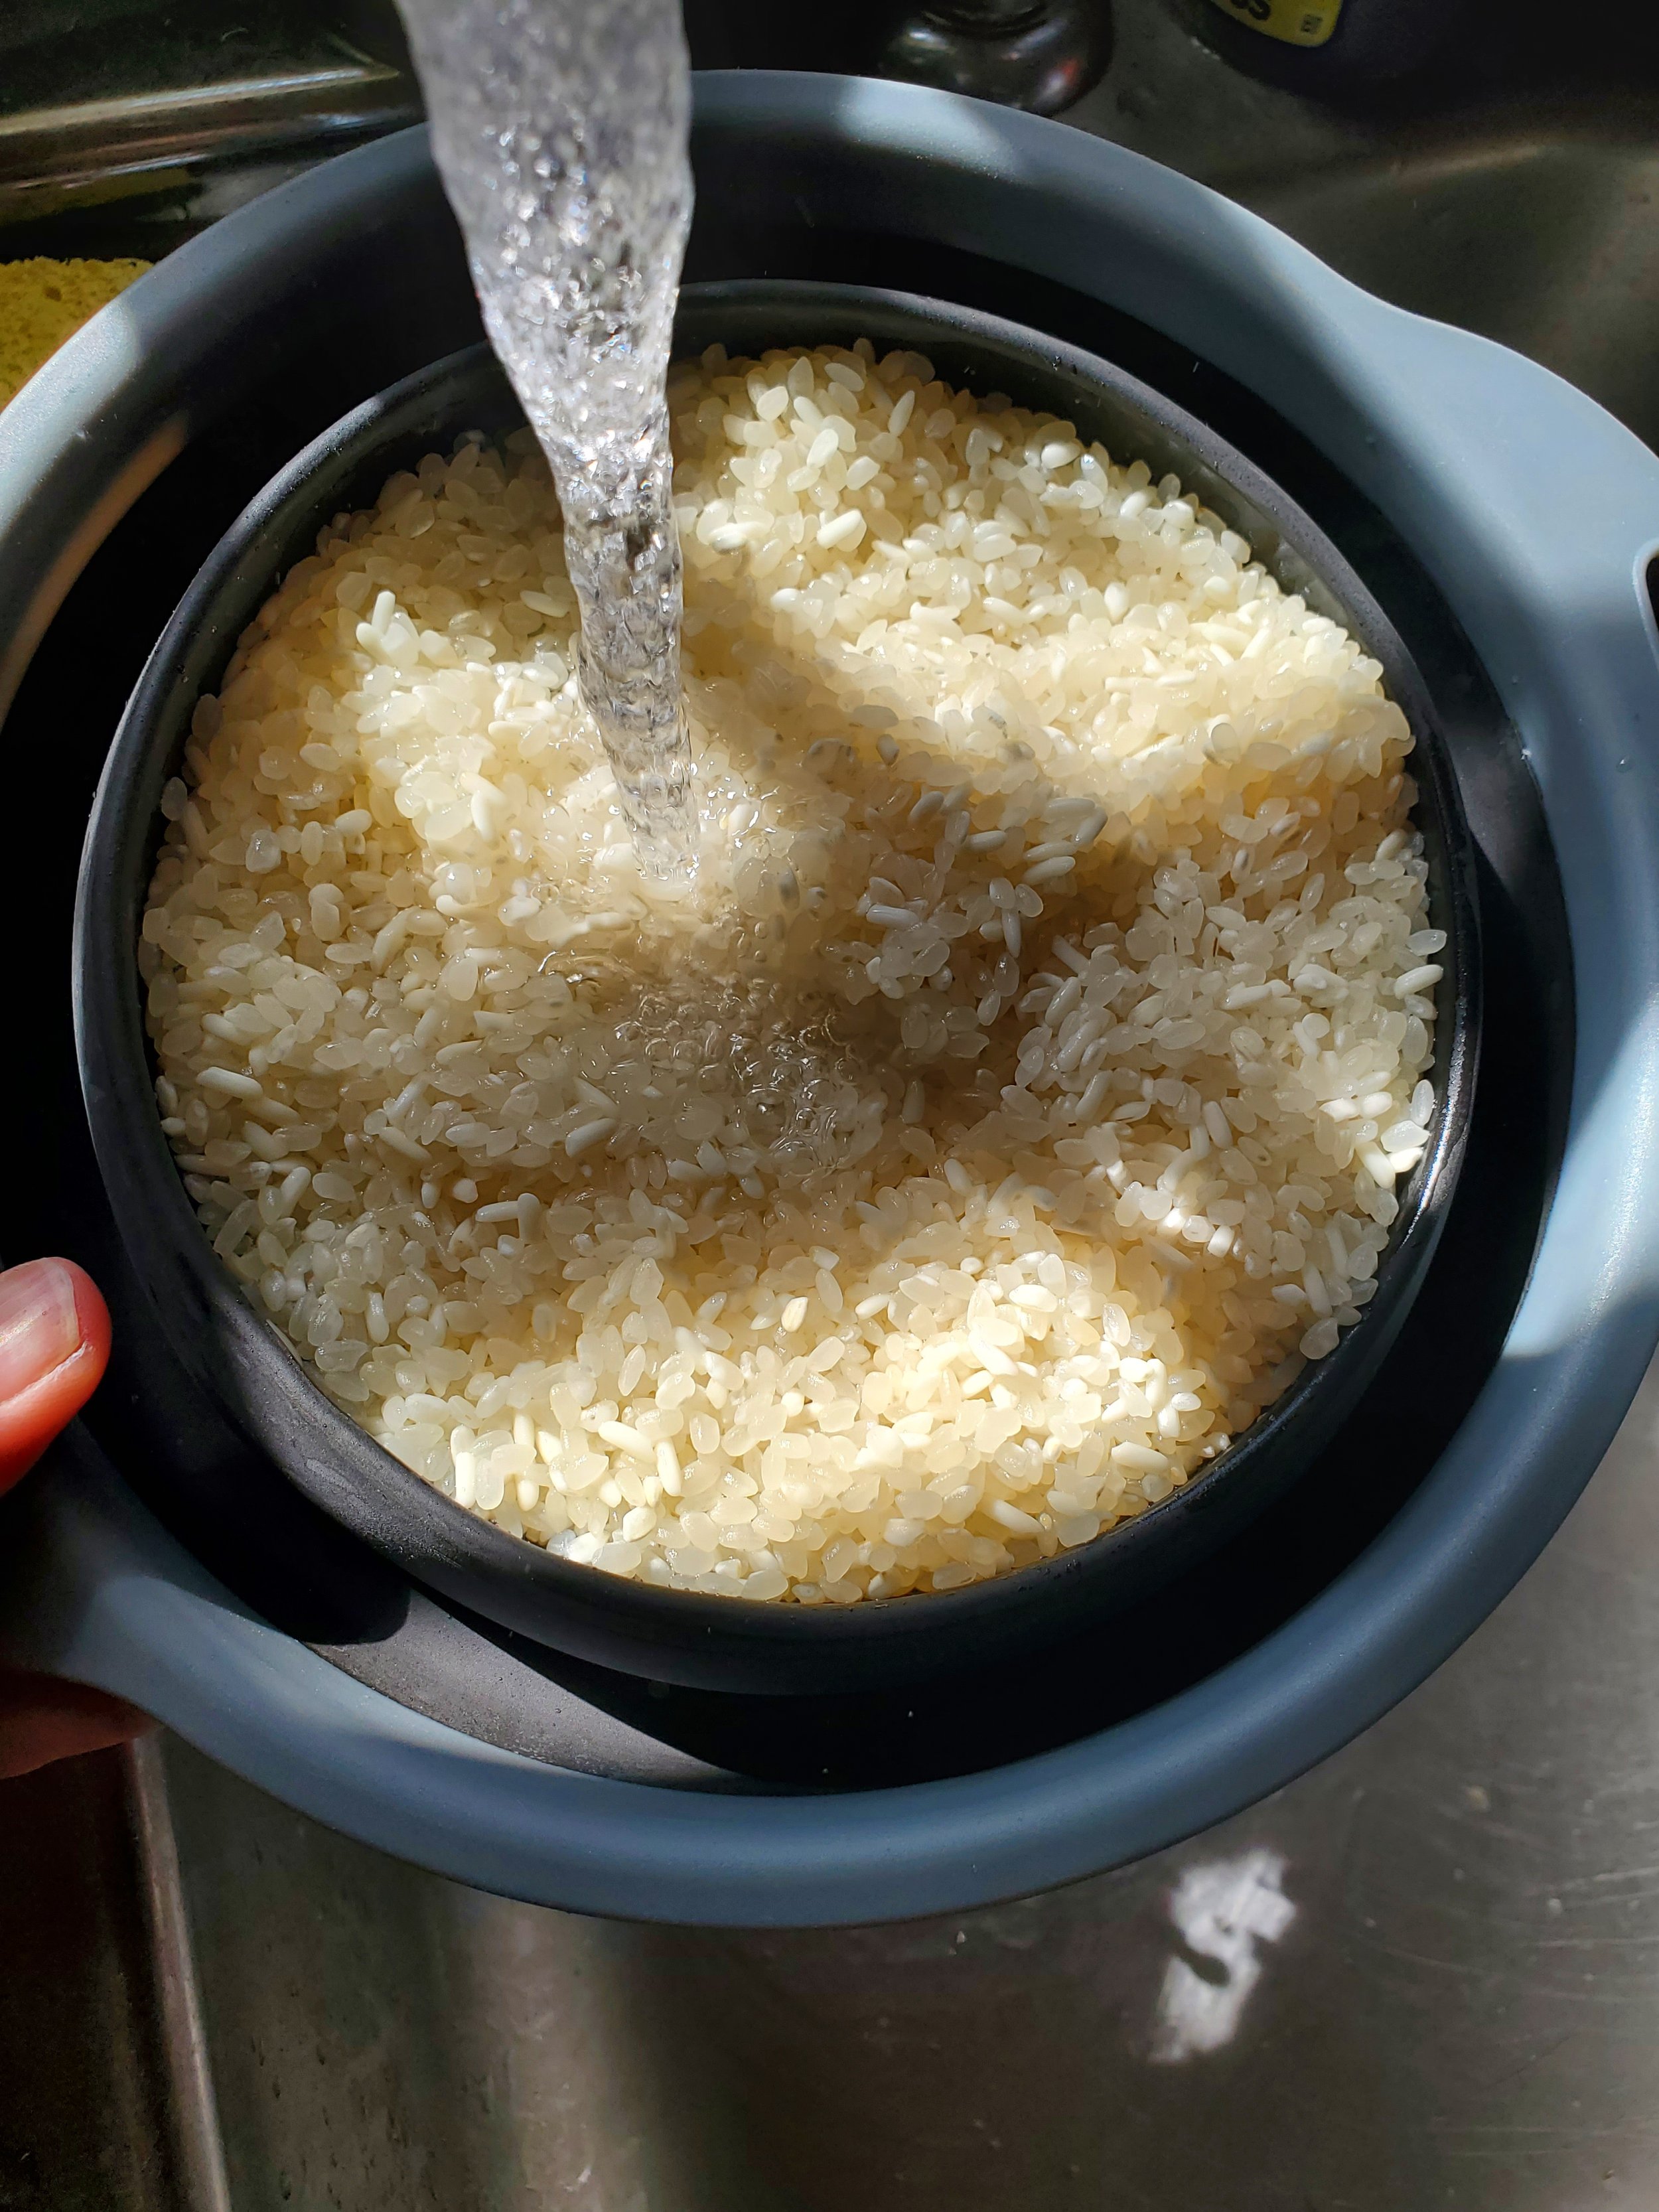
Start with the rice. Give it a quick rinse in the colander and transfer it to the pan. Measure in your turmeric, vinegar and water, and add a little salt and pepper to taste. Don't overdo it, as you'll muffle and mute the turmeric taste.


Cover the pan and bring the water up to a simmer. Let the rice simmer for five minutes or so, then turn off the heat. Set a timer for 25 minutes. Don't uncover the rice or remove the pan from the burner; keep the lid tight and the pan in place.


Find a little task to do to eat up a couple minutes. Maybe wash that colander from earlier, or go move a load of laundry or something. Collect all the things you'll need later in the recipe if you haven't done so already.


Once the timer is down to about five minutes left, preheat your oven to 425 and turn your attention to the fish.


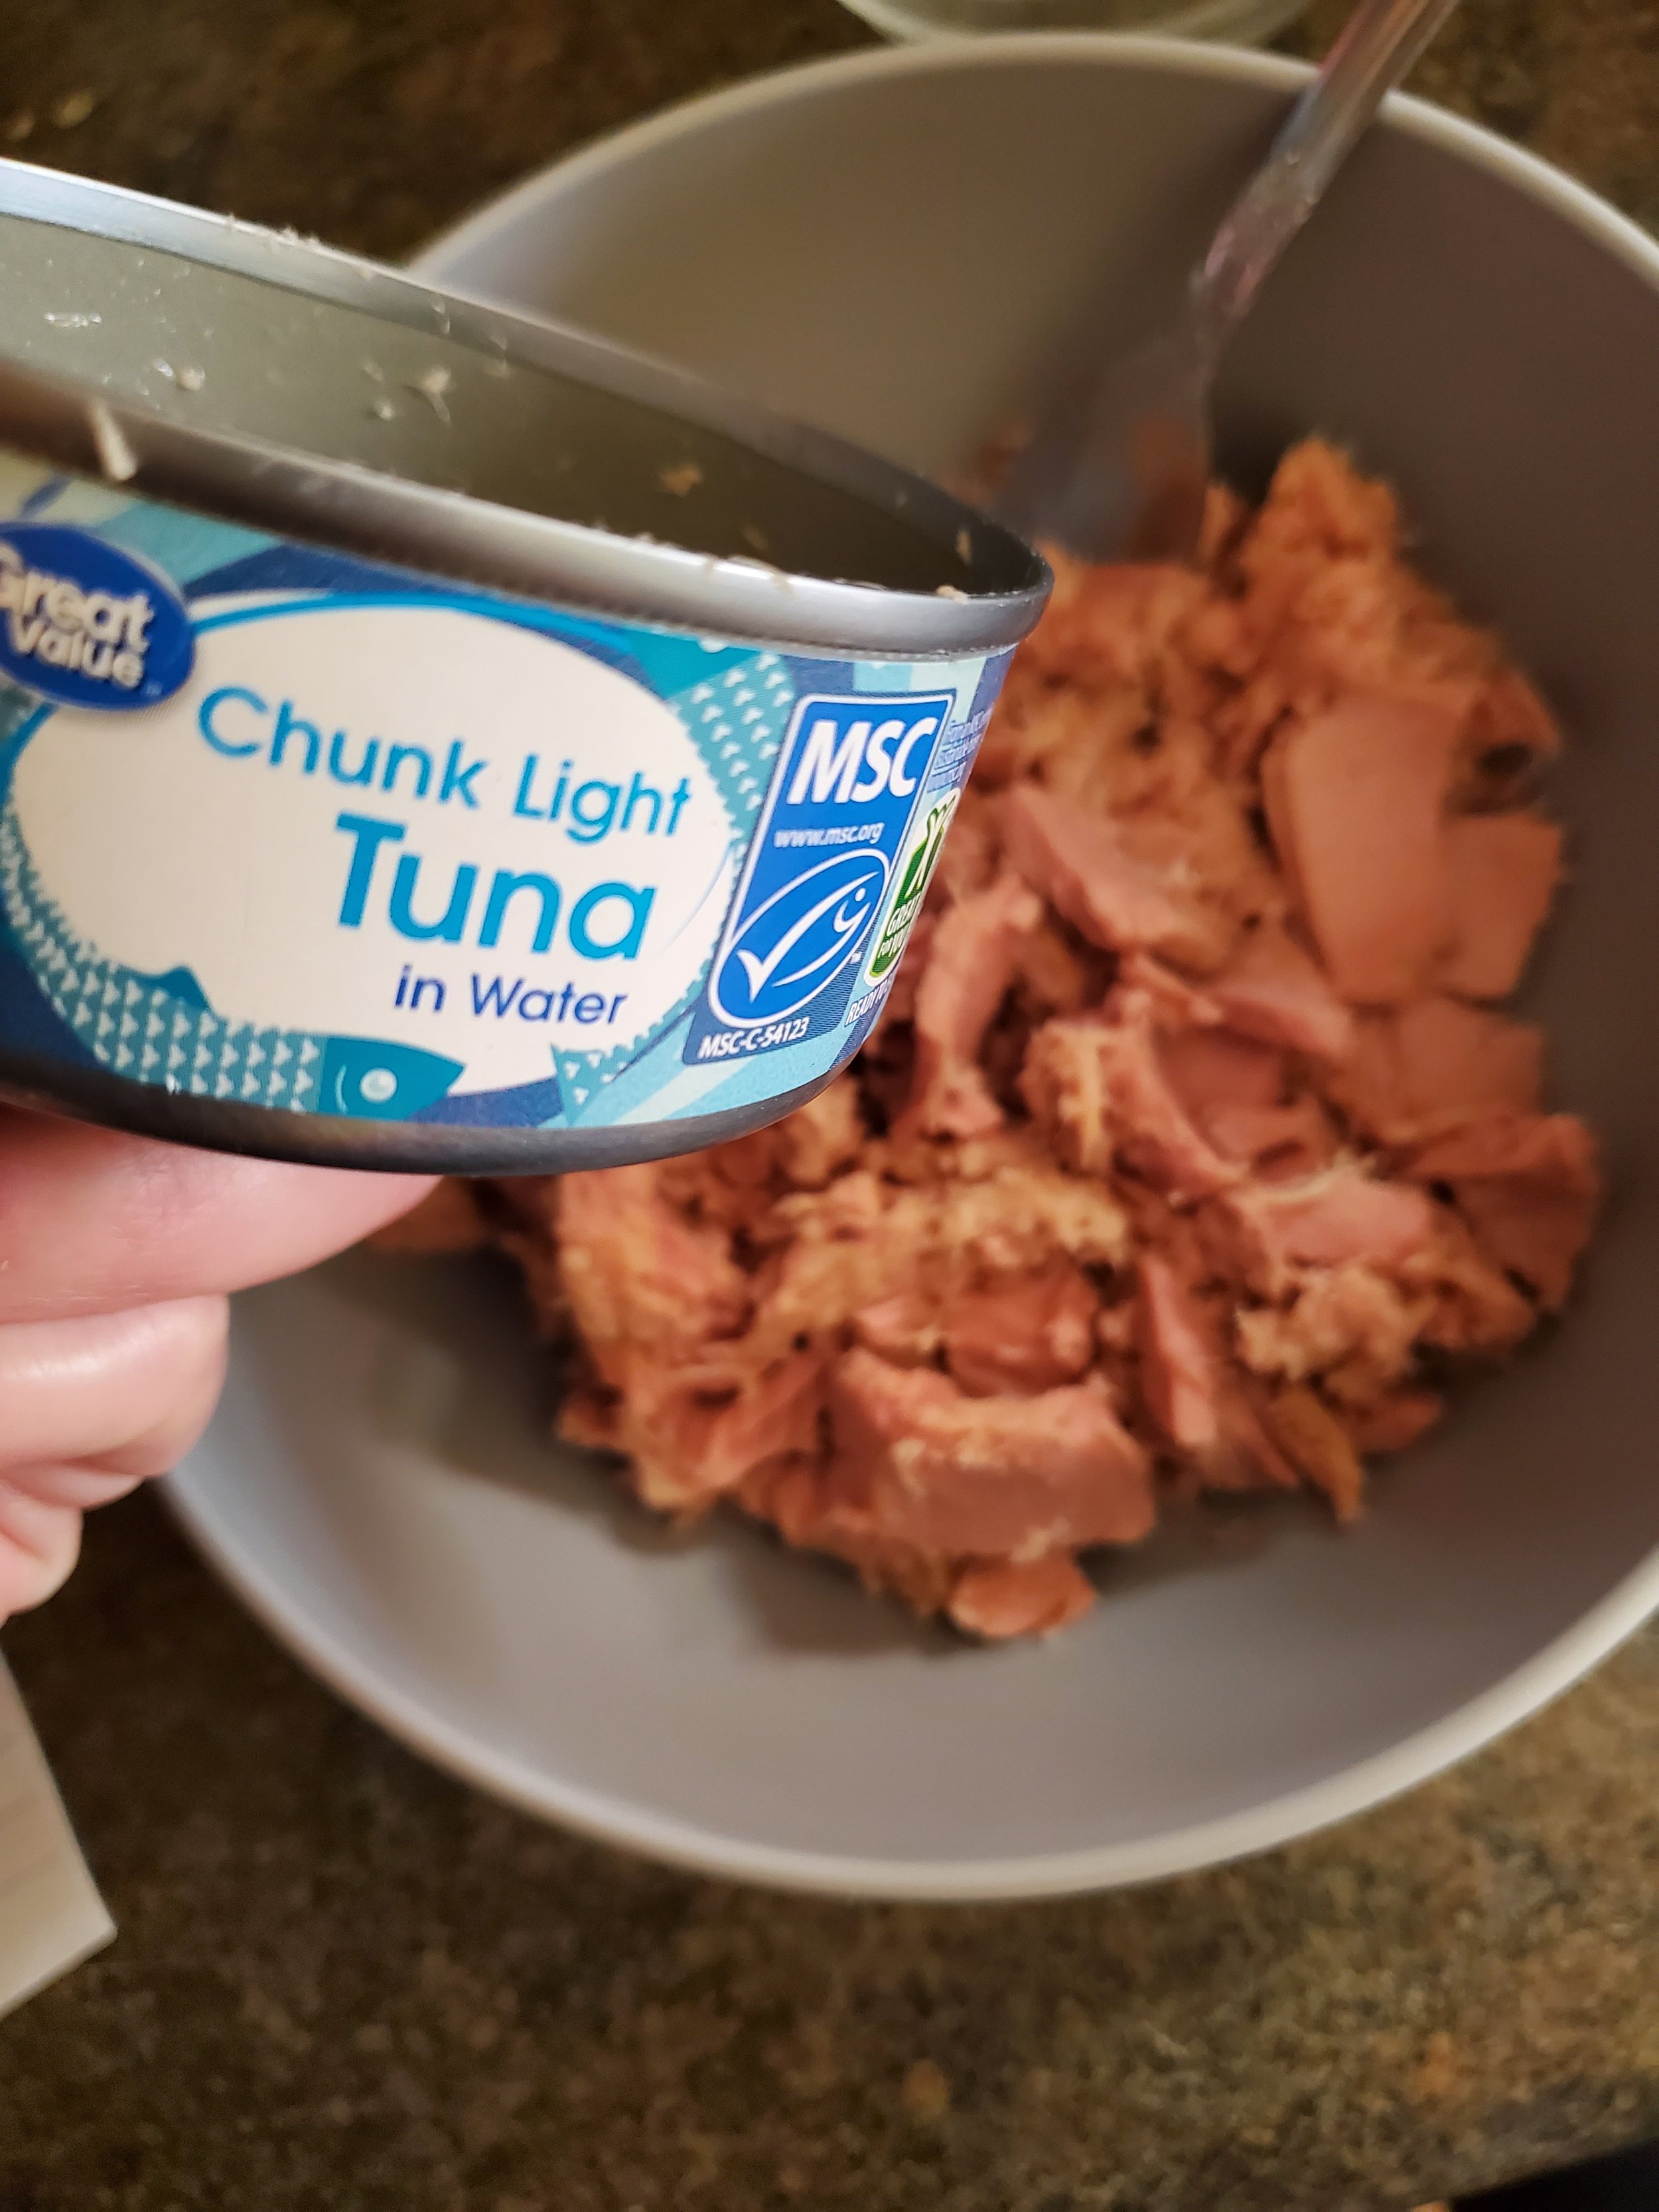
Open the two tuna cans and drain out the water. Dump the tuna into a mixing bowl and add the olive oil, then stir with a fork to break up the big pieces and get everything evenly coated. Measure in your paprika, thyme, garlic and parmesan cheese and stir until incorporated.


Tear off a seven-or-so inch piece of plastic wrap and use it to line a small bowl. We're targeting something just the right size for a scoop of ice cream, but if you have to go a little bigger, that's fine too - just make sure you have enough plastic wrap that the sides of the bowl will help you hold it.


Once the rice has absorbed all the water, you can remove the lid and give it a stir. It should be tacky enough to stick to the spoon you stir with.


Using the ice cream scoop, take up a level scoop of rice and plop it into the center of the plastic wrap in the small bowl. Take a clean spoon and press down in the center of your scoop of rice, creating a hollow and smoothing some of the rice up the sides of the bowl. 


Grab a forkful of your tuna mixture and put it in the hollow. Don't overfill it. You want there to be plenty of rice up the sides of the bowl to cover the tuna - but if there's not, you can add a little bit from the pot to cover up the top.


Grab the edges of the plastic wrap, bring them toward the middle of the bowl, and twist gently to pull the rice ball closed. Let any excess air out, and then continue twisting until the rice is densely packed around the tuna. 


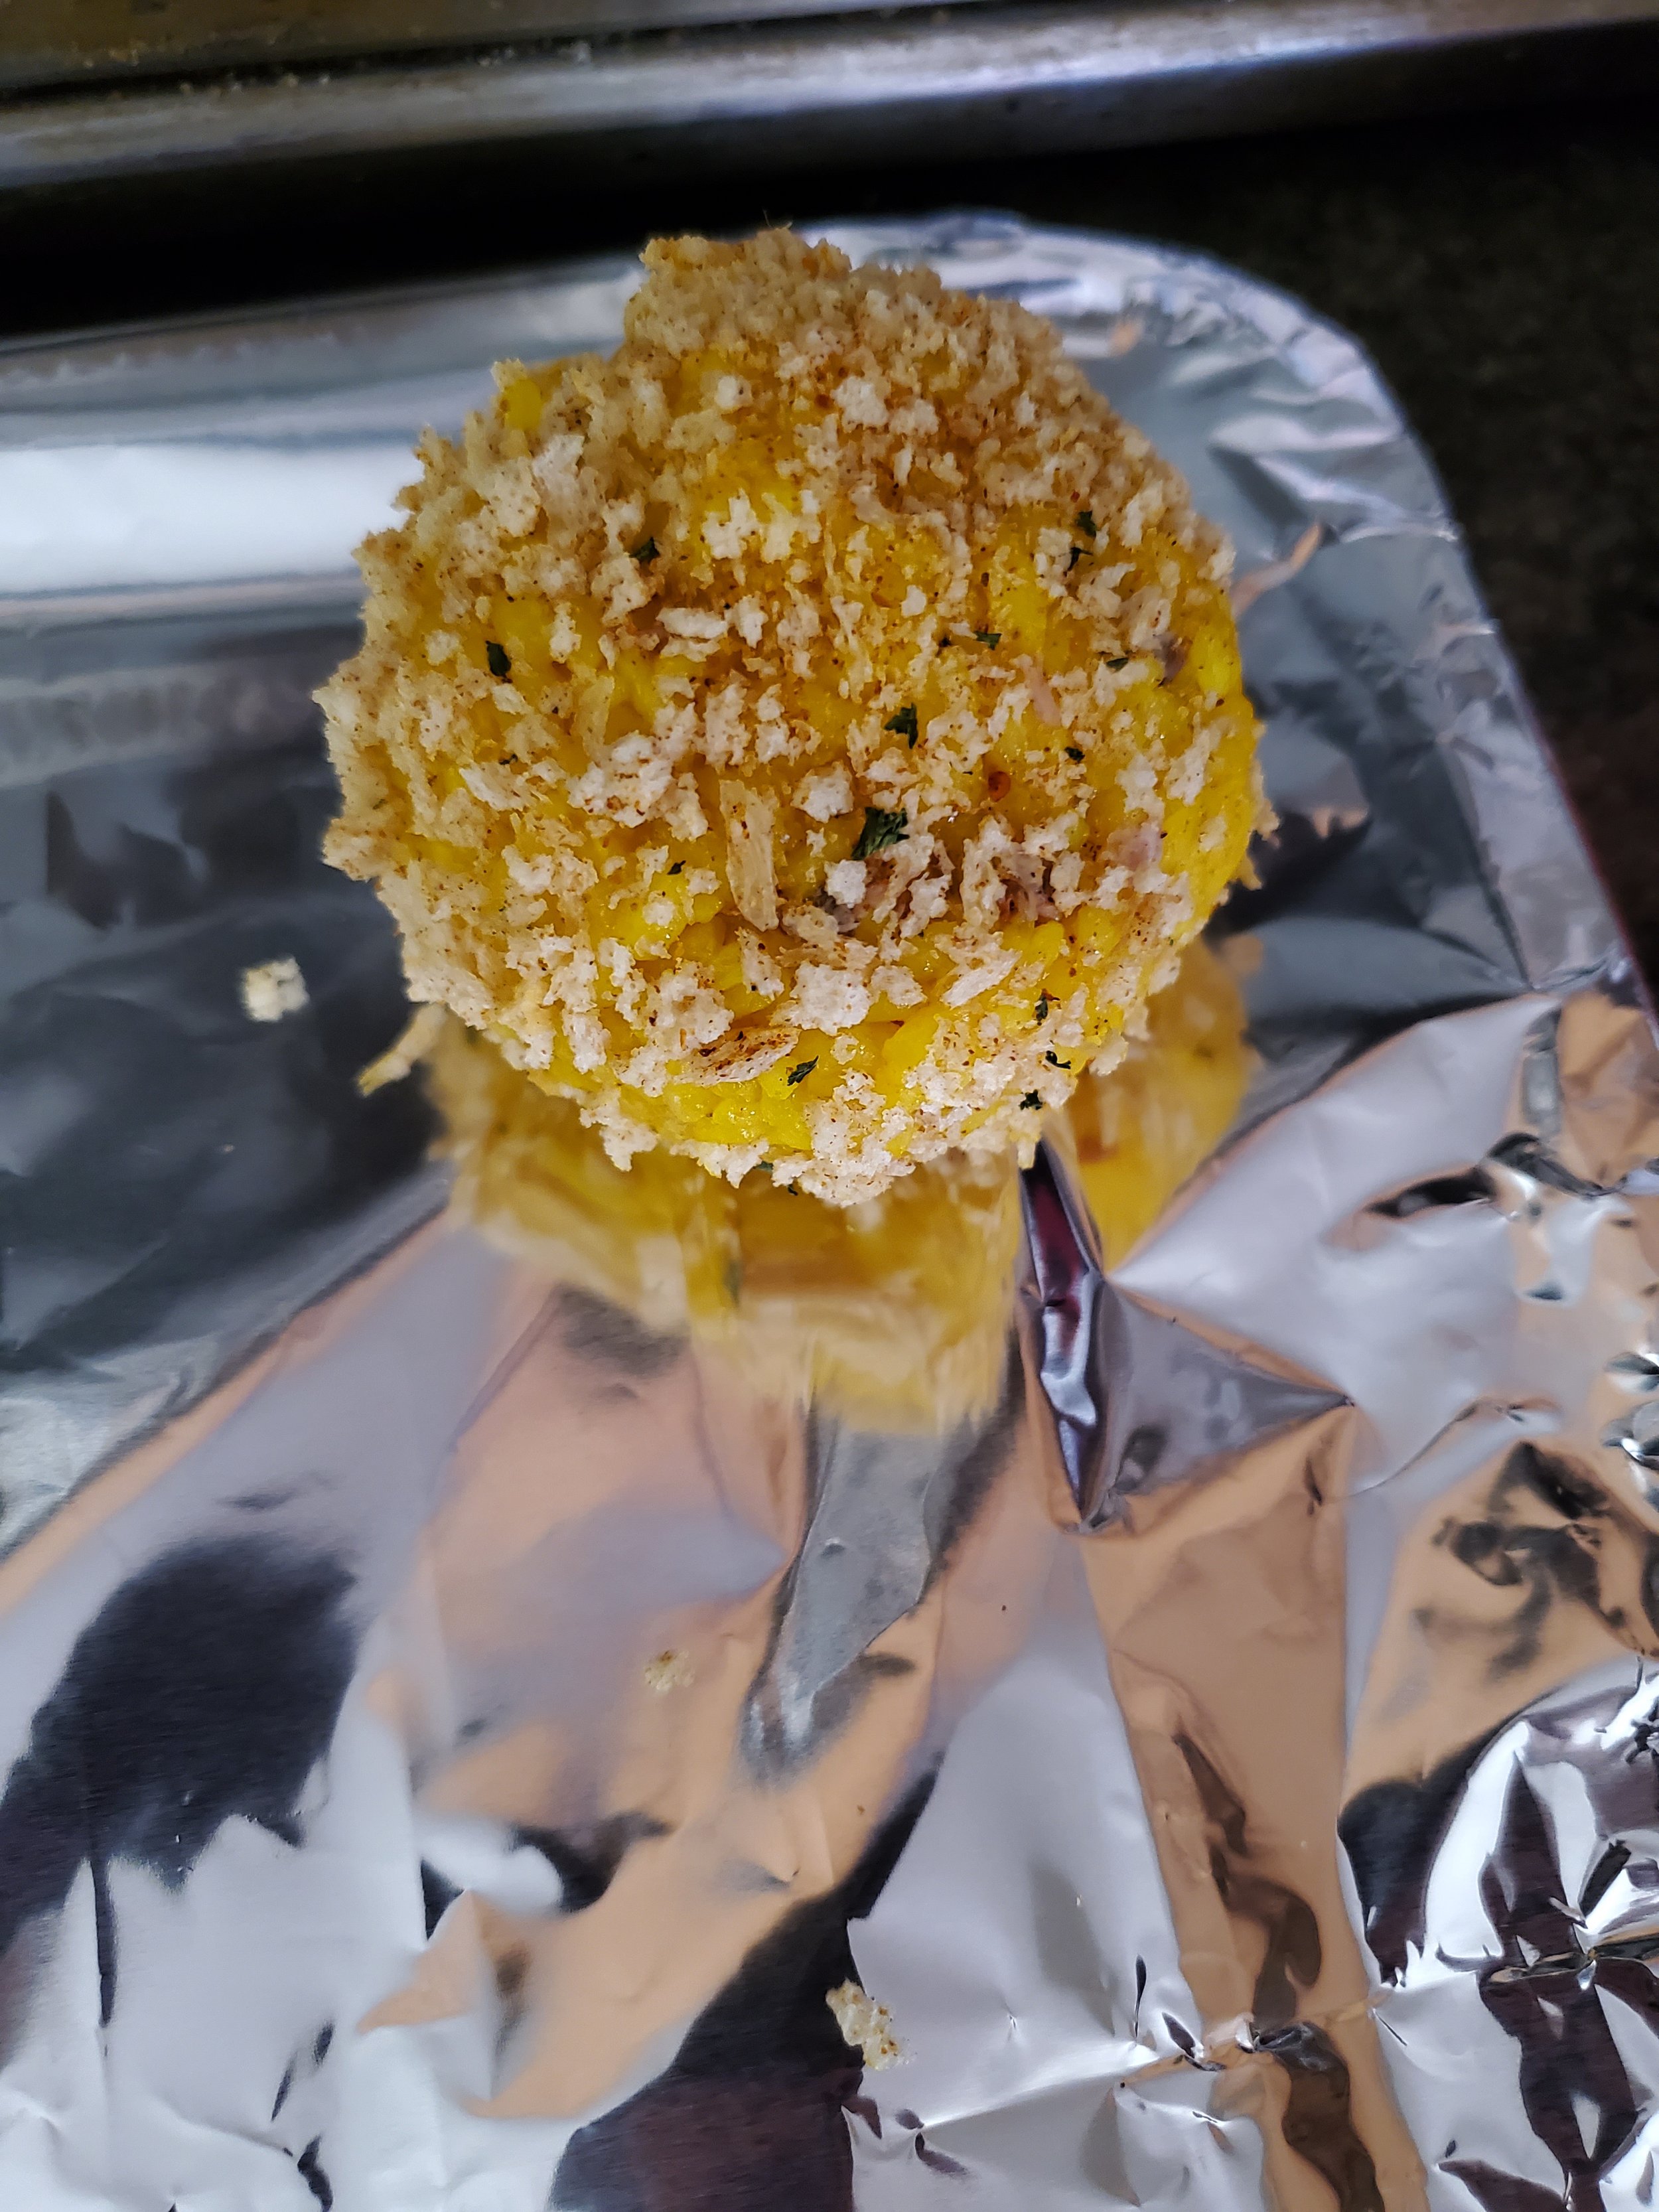
Un-twist the plastic gently, and drop the rice ball into a bowl of breadcrumbs. Roll it around a little to coat it, then transfer it to a foil lined baking sheet.


Repeat until you're out of rice. You should have 10-12 rice balls when you're done. You'll see nine pictured, but that's mostly due to space constraints - we worked with the toaster oven since it was an 80-degree afternoon, and only nine fit comfortably on the half-size pan.


Spray lightly with the olive oil spray, and bake at 425 for 20-25 minutes until lightly browned. We served ours with a little Tabasco sweet & spicy hot sauce.


This recipe is perfect for those busy weeks when you don't have time to cook every day. You can make a big batch and use it for lunches throughout the week, or even freeze it for later. Just remember to take it out the night before, and you'll have a delicious and healthy lunch with just a bit of reheating in the microwave. 


We've also been experimenting with different tuna options, and we think the recipe can be mixed up to include all sorts of flavors. If you have any ideas or want to share your favorite variations, please let us know in the comments on our Facebook page. We can't wait to hear from you!

Website
Office ((214) 599-0055) 


Additional Reading

Punchy Potato & Cheddar Rolls 


Spicy Lemon Pepper Shrimp


Impress Your Guests with This Easy-to-Make Apple Pecan French Toast Bake


Wondering How to Clean Your Appliances Sustainably? Eco-Friendly Methods Unveiled

Discover Effective and Environmentally Friendly Techniques for Keeping Your Appliances Spotless

Maintaining clean appliances is essential not only for the long life of your appliances but also for the well-being of your home. However, the conventional cleaning products often used can have a detrimental impact on both our appliances and the planet. In this guide, we'll explore the importance of adopting eco-friendly cleaning methods for your appliances and provide practical tips for incorporating natural alternatives into your cleaning routine. We’ll go room by room with you, looking at how best to clean your appliances and what to look out for while doing so. 


Kitchen:


Refrigerator:


Your refrigerator can get awfully messy. Things leak and drip between shelves. Containers get tipped over and food spills, and do you lose it behind other items. Your children sometimes decide to hide science experiments without telling you. And that is without considering food that's just gone off. All of that comes together and can make a horrible smell. So you need some ways that will really get it clean. 


To start with, no matter how tempting it is, don't take everything out of the refrigerator. Instead, go one shelf at a time starting at the bottom. Make sure to thoroughly dry each shelf before moving on to the next so that you don't leave the cleaning solution in place. 


What about particularly stubborn stains though? That is when our baking soda scrub comes in. Gunked on food, dried up spills, anything that's caked on there or particularly smelly, can be combated with baking soda. Grab your sponge and use it to give a good scrub to the interior of the refrigerator. (The baking soda works to neutralize the smells within your refrigerator through chemical reactions, which is why you're scrubbing with it instead of just leaving a box with a small corner opened.) 


All-Purpose Cleaner:

Recipe: Mix equal parts white vinegar and water in a spray bottle. Use it to wipe down the interior and exterior surfaces of the refrigerator. Vinegar effectively eliminates odors and kills most bacteria.


Deodorize with Baking Soda:

Sprinkle baking soda on a damp sponge and use it to scrub the interior of the refrigerator. Baking soda helps to absorb odors, leaving the refrigerator smelling fresh.


Stainless Steel Cleaner:

Recipe: Mix olive oil and white vinegar in a 2:1 ratio. Apply the mixture to a soft cloth and use it to buff stainless steel surfaces, leaving them clean and streak-free.


Dishwasher:

When it comes to your dishwasher there are two major issues that can be solved by cleaning. The first is smell from mold or mildew. The second is scale from minerals in your water. Fortunately, both are relatively easy to solve, using white vinegar and baking soda.


Lemon Fresh:

Recipe: Place a cup of white vinegar in a dishwasher-safe container on the top rack of the empty dishwasher. Run a hot water cycle with the dishwasher empty except for the container of vinegar. Then, sprinkle baking soda on the bottom of the dishwasher and run another hot water cycle to remove stains and odors.

Eco-Friendly Descaler:

Recipe: Mix equal parts white vinegar and water. Use this solution to wipe down the interior of the dishwasher, paying special attention to the door seals and any nooks where grime can accumulate.


Oven:

If you've ever had something fall off on the cookie sheet or Pyrex dish, only to get stuck to the bottom or side of your oven and burned on you know how hard it is to get your oven clean. We've mentioned before how self-clean modes can be dangerous. Sometimes, though you don't have the option for a steam-cleaned oven, built-in. Fortunately, it's easy to set that up yourself.  


Baking Soda Scrub:

Recipe: Mix baking soda with a small amount of water to form a paste. Apply the paste to the interior of the oven, avoiding the heating elements. Let it sit for a few hours or overnight, then scrub and wipe clean with a damp cloth. Don't scrub too hard though as you don't want to scratch the coating of your oven. Before trying this method, research what type of coating you have.


Steam Cleaning:

Fill an oven-safe dish with water and add a few slices of lemon. Place it in the oven and bake at a high temperature for about 30 minutes. The steam will help to loosen food particles, making them easier to wipe away.

Microwave:

After your refrigerator, your microwave is usually the easiest, if most time consuming appliance to clean. Just like with the oven, we're going to use steam and vinegar to start working at any buildup.  The lemon water steam will help with loosening dried on food, but doing a vinegar steam after will ensure that the microwave is disinfected after. 

Lemon Steam Clean:

Recipe: Fill a microwave-safe bowl with water and add a few lemon slices. Microwave on high for three minutes, then let it sit for five minutes. The steam will loosen dried-on food, making it easy to wipe away.

Vinegar All-Purpose Cleaner:

Recipe: Mix equal parts white vinegar and water in a microwave-safe bowl. Microwave on high for two minutes. The vinegar steam will help to loosen food and deodorize the microwave.

Laundry Room:

Courtesy of Monfocus


Washing Machine:

There are many nooks and crannies where ick can build up in your washer. This means that anything you use needs to be safe to run through the whole system. 

Vinegar Wash:

Pour two cups of white vinegar into the washing machine and run a hot water cycle. Vinegar will help to eliminate mold, mildew, and soap scum buildup.

Baking Soda Scrub:

Mix baking soda with water to form a paste. Use this paste to scrub the rubber door seal and other areas prone to mold and mildew. Rinse with a damp cloth.

Dryer:


Lint Trap Cleaning:

If you feel that there's too much buildup in your trap, even after scraping everything out, there are ways to get it clean. Remove the lint trap and wash it with warm, soapy water. Use an old toothbrush to remove any stubborn lint residue. Rinse and dry thoroughly before replacing it.

Vinegar Fabric Softener:

Instead of chemical-laden fabric softeners, add a half-cup of white vinegar to the rinse cycle. Vinegar naturally softens fabrics and helps to eliminate static cling.


Incorporating eco-friendly cleaning methods into your home maintenance routine not only promotes a healthier home but also reduces your carbon footprint. By opting for natural alternatives like white vinegar, baking soda, and lemon, you can effectively clean your appliances without harming the planet. Take the step to implement these green cleaning practices and enjoy the benefits of a clean, sustainable home. 


If you need assistance with appliance repair or maintenance, don't hesitate to reach out to us at Appliance Rescue Service. Our team of experts is here to help you keep your appliances running smoothly while preserving the planet for future generations. Let's work together towards a cleaner, greener world. 

Website
Office ((214) 599-0055)


Additional Reading

Don't Overlook Your Ice Maker: The Benefits of Regular Cleaning

Taking the Pain Out Of Melted Plastic
Why Is My Oven Smelling So Strange?

When Disaster Strikes: Your Action Plan for Appliance Emergencies

From Ovens to Dishwashers, Here's What to Do When Your Appliances Go Haywire

So, let’s assume that your appliance has given up the ghost in catastrophic fashion. What should you do while you wait for the repairman to show up? There are a lot of reasons that your appliances might go out catastrophically, we’ve talked about many of them at one point or another. But the how isn’t as important this week as “what should you do in the meantime?” Your first step should naturally be to call in a professional, but you have to deal with things in between when you call and when they get there to solve the problem.


Oven 


Just like with your dryer, your first step is to shut off the oven. Whether that is via the breaker or by turning it off from the display control is dependent on the situation. 


If you have a fire extinguisher, go ahead and use it now. A ruined dinner is much better than a ruined house. 


Once you've secured your immediate safety, you will definitely want to have a professional look it over. A fire is often a sign of a leaking gas line, sparking internal components, or damaged protective coatings or heating elements. While that is not always the cause it's also better to have a professional tell you that than  trying to definitively say on your own and finding out later that you were incorrect.  


In the meantime though, you can take the time to air out your kitchen, remove any dishes or food from your oven, but don't try to get to anything that might be stuck in the heating element. If that is where the source of the problem is, your technician of choice is going to want to see that.


Refrigerator and or Freezer

So your refrigerator or freezer decided that they just weren’t going to keep things cold? That’s rough. Sadly, your day is now on a timer, as you have about 8 hours before you start losing the food that’s in there. To avoid having food spoil, here’s a few steps to follow.


  • Your first step is to prioritize. What has to be kept cold (milk, greens, meats), what can safely warm up (lunch for today? Bread? Fruits? Condiments?) and what you’ll have to throw out (yes you wanted to have those leftovers for lunch tomorrow, but space is at a premium sadly.) 

  • If you have a separate freezer, transfer everything that needs to be kept frozen first. 

  • Next if you have coolers or can get hold of some of those cheap foam ones, that’s an option for the rest of your cold goods. 

  • Make sure that if you go with this route that you also purchase bags of ice to help maintain the temperature. 

  • Once you’ve taken care of your food, you’ve got an important decision to start turning over. What’s your limit for a repair? What point do you consider “not worth it” when it comes to repairing versus purchasing a new refrigerator or freezer? While we will always suggest repairing if possible, we’re practical just like you. Sometimes the cost of repairing is too high, and that is what you need to consider while you wait. 


Clothes Washer 

All you wanted was to knock out that pile of laundry, and now your laundry room is flooding and it’s seeping into the room beyond. What are your next steps?


  • Start by making sure that neither you nor your family are anywhere near the water. That needs to be your first step, to ensure no one is stepping into an electrified puddle of water.   While that might sound extreme, it’s better to ‘act as if’ when it comes to your safety and proceed forward after that. 

  • Your washer has high-voltage components and getting shocked is not something on anyone’s to-do list. 


  • Now that you know that no one living is in or near the water, time to find out if you can shut it off. See if you can find the plug and see if the water has hit the plug. If not, great! Go through the water, shut it off and unplug it. If yes, go to your breaker and shut off that fuse. 

  • Now that you’re safe, grab whatever is in the washer and remove it to let the water inside dissipate easier and let your repairman get a better look.

  • Your next step is cleaning up the water. Towels, mops, and wet/dry shop vacs are all options for getting all of them. What matters here is not allowing it to sit. 

  • If it has soaked into your subfloor or you suspect that it has, see if you can pry up a corner of the tile, hardwood, or carpet to inspect things. If it’s sagging or spongey, it’s probably soaked and is going to need replacing, unfortunately. At that point, we’re as clueless as the next person, so we suggest calling a restoration company. 

  • Make sure to clean and disinfect the entire area that was soaked, regardless of the sub-flooring. You don’t want to risk mold growing in this area, which is why getting things dried out is so important. 


Clothes Dryer 


Now, we did cover this in more depth in last week’s post, so we’ll just hit the high points and point you down to the ‘Additional Reading” section for the link. 

  • If you can get to the plug or the breaker, turn off the dryer as soon as you smell burning or see smoke. 

  • Provided you can see that this is definitely JUST smoke and not flame, try to get a good airflow through the room to get the smoke out of the room, but do NOT open the dryer itself. 

  • Do not approach until the smoke stops coming from the machine or it stops smelling like something is burning. 

  • Don’t start the dryer again. Leave the lint and vent trap alone as that is most likely where things started smoking or burning. 

  • When you can remove your clothes, be careful. They may be signed, and spots like metal buttons could still be hot enough to burn.

Dishwasher 

Having your dishwasher flood is similar but not quite the same as having your washer flood and so the steps for it will be also similar but not the same. 

  • Again, start by making sure that you, your family, and your pets are not in contact with the water.

  • If possible unplug from your kitchen, if not possible go to your breaker and flip the switch for your dishwasher from there. 

  • Carefully remove all of your dishes from the dish rack and place them into your sink. We can figure out washing or drying as needed once the mess is handled. 

  • Check the bottom where the dishwasher normally drains to see if there's anything blocking the drain. We advise wearing gloves for this part both because slimy food is gross and because you don't know what could be causing the blockage. 

  • While you wait to see if the water starts draining again go back up and reread our section regarding the clothes washer about damage to your subfloor, disinfecting and cleaning up the mess.

Is there anything that we missed? Either steps that you were requested to take or other tips you had suggested? Let us know on our Facebook page as always we enjoy hearing from you. 


As always, if you so choose, appliance rescue service is here for you. We service homes just like yours from addison, to mckinney, from Frisco to Carrollton,. And our top goal is and always will be getting your home running smoothly so that you can get back to doing what you do best. 

 You can reach out to us by giving us a call at ((214) 599-0055) or by going to our website. We will work with you to set up an appointment that fits your schedule. 


Additional Reading

Dryer Fires  

37 Reasons To Have Your Appliances Maintained Regularly


How an Appliance Repair Call Works